[toc]I recently uploaded Methodical, our first submission to the Unity Asset Store. During this process I found that complete documentation was hard to find. Now that I have gone through the process and understand better how submitting an asset to the Asset Store works I thought I would attempt to put together a more complete guide covering from start to finish. I am by no means an expert in submitting to the Asset Store, so if I’ve missed something feel free to leave a comment below.
Preparing Your Project
There are a few best practices you should follow when preparing your assets for the Asset Store. You should:
- Always start a new project for your asset. Although you will have the option to choose what folder in your project gets uploaded to the store you should still develop your asset in its own separate project vs. developing it in the projects for your games. This way there is no danger of your asset referencing other assets (code, textures, etc.) that won’t be included in your final product.
- Include a user guide in the root of the folder you upload to the Asset Store. This can be as simple as a readme.txt file or as complex as a PDF.
- Code assets should be in their own namespace to prevent naming conflicts with customer’s own code. These kinds of conflicts are a big source of frustration for customers, especially since it is so easily avoidable.
- Read the Unity Asset Store Submission Guidelines! This is absolutely required reading. It will tell you the exact requirements your submission needs to follow in order to be accepted
Installing Asset Store Tools
Rather than having a web interface, Unity has built an asset on the Asset Store that allows publishers to create, publish, and manage their Asset Store assets from the Unity editor itself. You’ll have to download the “Asset Store Tools” package from the Asset Store in order to proceed.
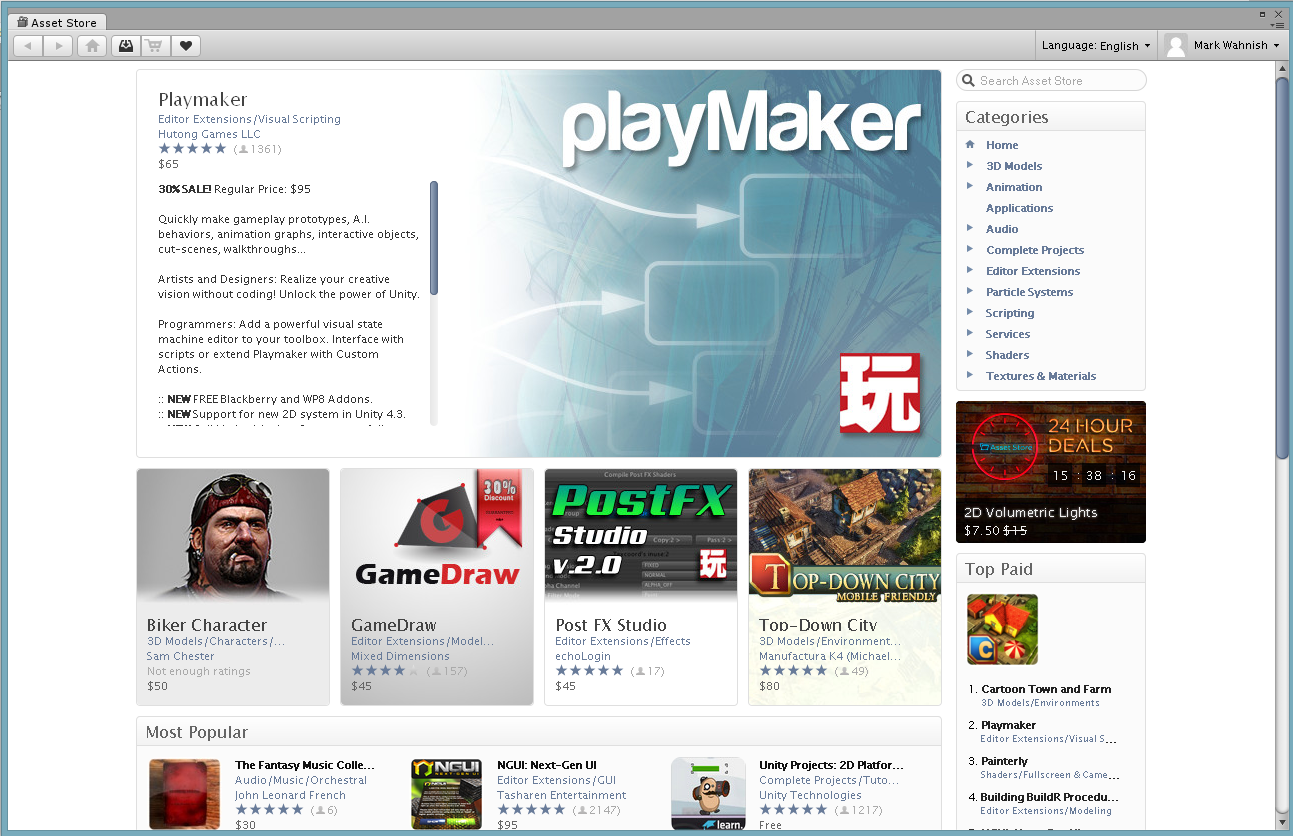
First, open the Unity Asset Store by clicking Window>Asset Store. You can also access the Asset Store using the ctrl+9 keyboard shortcut.
If you haven’t already, create a a user account by clicking the Create Account button at the top right of the Asset Store Pane and fill in the required information.
After you create your account, you should receive a confirmation email from Unity at the email address you used to create your account. After you confirm, go ahead and click Log In to log in to the Asset Store window.
Next, search the Asset Store for “Asset Store Tools” and open the result shown below:
Go ahead and download the Asset Store Tools package. by clicking Download. Once the download finishes Unity should open the import dialog. Make sure all of the package items are checked and then hit import. Once the package fully imports you will see a new menu option in Unity called “Asset Store Tools”. If it doesn’t appear immediately in the menu you can click on another menu item to force a refresh.
The Asset Store Tools menu contains everything you need to submit to the Asset Store. Here’s a rundown of each menu option:
- Package Manager – Tools for registering, updating, and uploading your asset package to the Asset Store
- Mass Labeler – A tool for quickly tagging different objects in your package all at once. This is important since the Asset Store uses these tags as keywords for search in the Asset Store
- Publisher guidelines – This is a link to the Unity publisher web interface
- Guidelines – A link to the Asset Store submission guidelines. Read these very carefully because your package will get rejected if you don’t follow these
- Key Image Templates – Downloads the image templates for your asset store submission. These templates allow make sure the images that will be displayed on your store page, the Asset Store front page, and in search results will look good.
- Asset Store Logout – Logs out of your account, of course!
Setting Up Your Publishing Account
Next, you’ll need to set up your publisher account. First, you’ll have to log in to your publisher account (the same account you created earlier). Click Asset Store Tools > Package Manager and then log in.
Once you are logged in, click the Publisher Account button in the Package Manager window:
Here you can set up all of the info people will see when they click your name in the Asset Store. Here’s what you can edit in this window:
- Publisher name – This is the public facing name of your publisher account. Rather than displaying your username, you can use this field to display a company name on your publisher page.
- Publisher url – This is the public facing URL for your account. Point this to your company website.
- Publisher description – This your publisher biography. Tell the customer about yourself!
- Key images:
- Small 200×258 – This is a small image representing yourself. Set this by clicking the image preview. This will open a file selector so you can upload your image. Once selected, the preview button will be replaced by the image you selected. If you make a mistake and need to change this image clicking the preview will remove the old image and reopen the file selector.
- Big 860×389 – This a large image representing yourself. It is displayed in the background of your Publisher information page (as shown below). The procedure for uploading and modifying this image is the same as the previous small image.
- Make sure your image sizes match the required dimensions or the Package Manager will silent reject your choice. Also, these two images should be based off of the Big and Small image templates (more on that later!)
Below is an example of some dummy publisher information in the Publisher Account window and the corresponding information in the store page.

Right: Publisher Information View with dummy data. Left: The store page with corresponding dummy data
Go ahead and click save.
Tagging Your Package
Tagging your asset is very important because it allows your asset to be found in Asset Store searches. Rather than tagging your entire package you tag individual objects in your asset which can seem a bit counterintuitive. For example if your asset was a collection of car models you could label each car individually with tags like “sports car,” “minivan,” or “crappy”. Once your asset is on the Asset Store these tags and your asset’s name will be used as keywords for Asset Store searches. Note that you cannot label folders, only the assets inside.
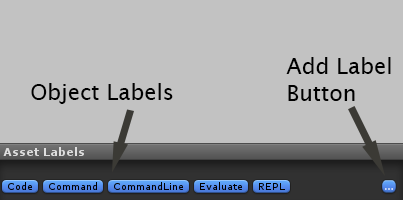
Adding tags to objects is really easy. Select the object you want to tag in the Project Window and view it in the Inspector. In the preview window in the inspector you should see a blue “…” button. Click that button, type your tag into the search bar and hit enter. It’s as easy as that! Your tag will appear to the left of that button.
The Asset Store Tools package has a tool called the “Mass Labeler” for adding tags in bulk. Using our previous example, if I wanted to tag each car prefab with the label “car” it would be much easier to use the Mass Labeler to set them all at once rather than label each one as a “car” individually.
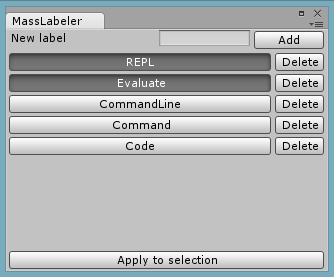
Open the Mass Labeler by clicking Asset Store Tools -> Mass Labeler. First things first, you’ll want to add some labels. Simply type your new label up top and hit add. Note that you are not adding that tag to an object (not yet anyways,) you are adding it to a pool of labels that can then be applied to any object in your submission.
To tag an object with the Mass Labeler select it in the Project View, select the labels you want to add and click Apply to Selection in the Mass Labeler. You’ll notice when you click labeled objects in the Project View the Labels belonging to that object will highlight in the Mass Labeler.
As far as I can tell your asset will be searchable by tags immediately when your asset is admitted to the Asset Store but it may not be searchable by the asset name for a few days.
Publishing Your Package
Finally! It’s time to upload your asset! Go ahead and open the Package Manager by clicking Asset Store Tools -> Package Manager. You might have to log in using the account you made earlier. Create your package by clicking the Package -> [Create New] at the top of the Package Manager window. Here’s the data you’ll need to enter below:
- Package Title: Exactly what you’d expect. This will be the title of your asset in the Asset Store. Potential customers will also be able to search for your asset by this name.
- Description: This is the description of your package. You can use the <em>,<strong>,<a> and <br> HTML tags here which is super useful. The area for descriptions in Asset Store pages is pretty small so styling really helps make things look organized and aid readability. Take advantage of the preview function of the Package Manager. Chances are your styled descriptions won’t look the way you want them to first try.
- Version changes: This is the change-log for your asset.
- Category: This is the category your asset will be filed under. The Package Manager puts all of the Categories in an impractically big list, so your best bet is to browse the Asset Store online when choosing your category and then come back to the Package Manager and select the right one once you’ve figured it out.
- Price: Look around for assets similar to yours in order to get an idea of pricing. The Unity Submission Guidelines has a handy guide for pricing that you should refer to as well.
- Assets Folder: Select the folder containing your asset here. This folder and all of its contents will be imported when your customer imports your asset.
- Main Assets: Select the Assets that will have previews in the Asset Store. Big important note: as far as I can tell this is a pro only feature because it requires asset bundles, and you should only select files that can preview in the inspector. That means PDFs and Word files will not work. If you get any kind of error in the Unity console after submission it is probably because of an invalid file type or from trying to use this feature in Unity Free. In practice your asset will upload even with an error but you should still verify a successful submission in the Publisher Tools Web-Interface (more on that later!)
- Key images: These are the images displayed in the store representing your product. Your big image is what gets displayed on your asset store page, the small image gets displayed in search results, and the logo will be displayed in places where space is limited like the front page. Make sure your your images match the size requirements, or else the Package Manager will reject the image (without an error). Use the Key Image Templates (Asset Store Tools -> Key Image Templates) to ensure your images are formatted correctly. Refer to the Unity Submission Guidelines for more details on how to use these templates.
- Screenshots: Make sure you pick good screenshots!
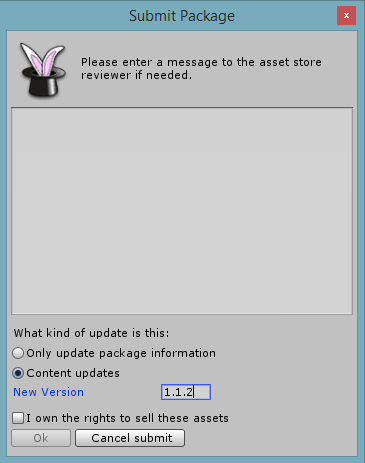
You’re done! go ahead and hit submit! The next screen will give you an opportunity to leave a message for the Asset Store team and set your version number.
Once your asset gets uploaded it will take several days for the Unity Asset Store team, so be patient! You should receive a confirmation when your submission is received, and another when your asset is accepted or rejected.
Your asset could get rejected if they don’t follow the Unity Submission Guidelines, so make sure you read them thoroughly! Your asset can also be rejected if there are quality concerns or bugs. If your submission gets rejected the reviewers will email you feedback so you can make the appropriate changes.
Publisher Tools Web-Interface
Unity has a web-interface for managing your uploaded assets. Go here (or click Asset Store Tools -> Publisher Administration in Unity) and log in. Here you can see your sales numbers for all of your assets, your revenue, invoices, and other important details about your submissions. Most important right now is is the Pending Tab. There you can verify if your submission was successful. if you see your asset there with the status as “Pending” you are good to go.
Also, you’ll want to fill in the data in the Info and Payout tabs before you get too far. The stuff in the info tab gets placed into your publisher page, and you’ll definitely want to fill out the Payout tab (you want to get paid, right?!)
Updating Your Asset
There are two kinds of updates you can do, updating the asset and updating the other content in your asset store page (like descriptions, titles, etc). Changes in your submission page content will update almost immediately. Asset updates have to be reviewed just like your original submission and will take several days.
When you upload an Asset that has already been submitted you’ll be given the chance to choose what kind of update you want to make. Choose Content Updates if you want to update your asset and your submission content together. Choose Only update package information if you only want to upload your submission content. If you chose Content Updates make sure you increment your version number! Your asset wont upload if you don’t do this.
Hopefully this little (ha!) guide helps you submit your assets to the Asset Store. Thanks for reading! If you have any questions or want to suggest an addition to this guide please leave a message down below!


